December 11, 2013

Ulubulu Giveaway and Product Review


Ulubulu Giveaway and Product Review:

Happy Cow Silicone Bib
Happy Cow Silicone Baby Bib

Personalized Pacifier Clip
Fruit Salad Pacifier Clip

Asymmetric Pacifier Caps
Pacifier Caps

White Pacifiers
White Personalized Pacifiers

Ulubulu Website: http://www.ulubulu.com/shop/
Ulubulu Facebook Page: https://www.facebook.com/ulubulu

GIVEAWAY RULES:
1. Must be 18 or older.
2. Must subscribe to my channel.
3. Comment below and tell me one of your favorite baby/child products.

The winner will be able to choose any product up to a value of $10 which is almost everything on their website!

Last day for entries is Tuesday, Dec. 18th at 11:59pm MST.

October 28, 2013

How to Prepare Your Child for a New Baby


Some tips for preparing your child for a new sibling:

1. Talk to your child about the baby a lot during pregnancy, what the baby will do, how the child can help, everything!

2. If you know the gender and have chosen a name, start calling the baby by their name in front of the child. This helped us immensely because once Baby Sister was born, my daughter already knew her sister as "Abby". Instead of the baby just being this 'thing' she could put a name with her face.

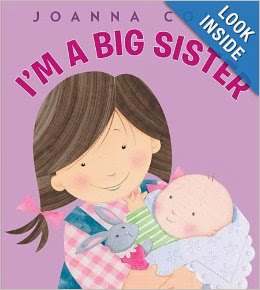
3. Buy special gifts for your older child to give to them around the birth of the new baby. We bought a Big Sister Bear (see below) and some Big Sister books (also below) and wrapped them up and put them in our hospital bag. Then when our daughter came to meet her new baby sister, she got to open up presents for her, because after all, it was a very special day for her too! It's the day she became a Big Sister! Ever since she has LOVED her Big Sister Bear.

4. Let the child help out as much as possible! We let our daughter hold the baby (with supervision), get us wipes and diapers for diaper changes, throw away the dirty diaper, fetch a burp cloth, help soothe the crying baby, play with the baby, show the baby toys, etc.

5. Spend quality time with your older child. We would try to spend one-on-one time with our older child so she knew we still valued time alone with her. I tried really hard at bed time to help put her to sleep and if I was feeding the baby, I would still go in and say good night afterwards. 

6. Always try to say "Yes" to your child's requests. If they ask you to come play with them, instead of saying "No, not right now" say, "Yes, I'd love to just as soon as the baby's fed (or diaper is changed, or baby stops crying, etc). This way, they always hear "Yes" instead of "No" and they don't have negative feelings towards the baby.

7. Another suggestion (not mentioned in the video) is to let your child have special toys or activities that they only do while you are breastfeeding/bottle feeding your baby. This way it makes feeding time fun for the older child since you are tied up with the baby.

8. Another suggestion (not mentioned in the video) is to show your older child pictures of when they were born and of them as a baby. Our daughter loves seeing pictures of herself when she was a baby and that helped her to understand what was going to happen. She liked seeing pictures of my pregnant belly when she was inside of me.


We let our daughter help set up the baby's crib. We praised our daughter for "sharing" her old baby crib with her baby sister and emphasized that she didn't need her baby crib any more because she was a Big Girl.


We encouraged our daughter to touch and feel my growing belly, and to talk to her baby sister inside.


They are best of friends! 


Our daughter loves holding her baby sister. She asks us all the time if she can hold her. We never say "No" to this request! We want her to love her baby sister! Again, if the timing is not right we will say, "Yes you may hold her as soon as she is done eating (or whatever)." 


Our daughter loves sharing her baby toys with her baby sister.


Our daughter loves having a pretend baby doll to do the same things we do with our newborn. She pretends to feed her baby doll, change her diaper, push her in her stroller, etc. It helps make her feel included and needed.


To make a Big Sister or Big Brother shirt, simply buy a plain t-shirt at a craft store or a second-hand store (what I did for $1-$2). I bought an alphabet stencil, craft paint, and simply sponged on the letters on the t-shirt. Then I ironed on some cute flower appliques from a craft store. 


Holding her Baby Sister for the very first time. Can't you see the love she already has for her new sibling?  


Admiring my growing belly during pregnancy.


Playing with her pretend baby dolls while I care for the baby.


Big Sister Bear HERE

Big Brother Bear HERE

Big Sister Books Here, Here, and Here


Big Brother Books Here, and Here

Some Great Articles on Preparing your Child for a New Sibling:

August 8, 2013

How to Plan a Successful Outing with Kids


1. Be Flexible
2. Be Prepared
3. Think like a Child
4. Lower your Expectations

May 28, 2013

What's in my Hospital & Diaper Bag for Labor & Delivery


Here's my latest video on "What's in my Hospital & Diaper Bag for Labor & Delivery"

Okay, I did an updated version of my older video What to Bring to the Hospital for Mom & Baby. I have changed a few things having done this once before. But I still think most women bring way too much when they come to the hospital. I've seen women come in with a 5-piece set of luggage like they're staying for 2 months. As a labor and delivery nurse for 8 years, I have seen the essential things that women should bring in to the hospital, and some things that could probably be left at home. Either way, it's all a matter of opinion!

Packing List for Mom and Baby (Essentials):
-lip balm or chapstick
- camera/video recorder
- toiletries and makeup (don't go overboard!)
- nursing bra/underwear
- comfy pants/pajamas, loose shirts
-slippers and/or socks
-car seat (YOU MUST HAVE THIS!)
- 1 outfit for baby to go home in
- 1 blanket for baby

Optional items:
-extra pillows, music, movies, cards, books, games, writing material, laptop, watch or clock, robe, slippers, lotion, boppy pillow, hand mittons/baby socks to cover newborn's hands, robe, phone/ipod chargers

Hospital should provide the following (while at the hospital):
FOR BABY: blankets, onesies/shirts (many with fold-over sleeves so baby doesn't scratch him/herself), burp clothes, diapers, wipes, hat, bulb syringe (aka nose sucker), pacifier (if requested).
FOR MOM: pads (both large and small), mesh underwear, toiletry items like shampoo, lotion, soap, toothbrush/toothpaste (if you ask), non-skid socks/slippers, patient gown, pillows, blankets, tucks medicated cooling pads for after delivery, breast pump, breast pads, formula/bottles (usually have to request this), towels, spray/squirt bottle.

Here are some other helpful links with Hospital Packing Lists: Here, Here, and Here.

Let me know if you have found any other 'essential' items or 'nice to have' items for labor and delivery!

Pregnancy Vlog- 38 Weeks


Here's the link to the latest (and probably last) pregnancy vlog: Pregnancy Vlog- 38 Weeks


I recently had some maternity photos taken. We really wanted to have maternity photos with our first daughter, but she came 3 weeks early unexpectedly so we missed our maternity photo shoot appointment. This time I really wanted pictures since we don't know when or if we'll ever be pregnant again (though hoping we will be again!).


May 20, 2013

Cutting Edge Stencil Blog Feature

I am featured today on Cutting Edge Stencil's blog!

Sweetest Moroccan Dream stenciled gray and pink nursery design! http://www.cuttingedgestencils.com/moroccan-stencils.html

A little girls room before the stencil process.

Get this Moroccan Dream stenciled gray and pink nursery design with these items! http://www.cuttingedgestencils.com/moroccan-stencils.html

Be sure to check out my SOURCE LIST to see where you can get these items too!

Mikarose Product Review

I was thrilled when I found out I had an opportunity to review a dress from Mikarose. I love this company for so many reasons. 

First, their clothing is modest, it covers everything up in all the right places. No tucking or pulling to cover up under garments. 

Second, the material they use is incredibly comfortable and stretchy. It really fits like a glove over all your curves. 

And third, Mikarose provides clothing that is perfect for all stages including pre-pregnancy, pregnancy, post-partum, and nursing moms. 

36 weeks
I am wearing the Bailey dress in Mint. I am a sucker for anything mint color, so I knew this was the dress for me. However, the dress comes in many different colors! I love the belt detail with the buttons around the waist. And the sleeves aren't too short or too long, they hit just at the right place. 

One of my favorite things about this dress and most clothing from Mikarose is that you don't have to wear a tank or undershirt underneath. I just love the ability to throw on the dress without adding bulky layering underneath. And this dress could easily be paired with a cardigan for chilly weather, or leggings, or flats, or heels. It truly is so versatile!

I own many other products from Mikarose, but my favorites are their dresses. I'm looking forward to wearing this dress for the remainder of my pregnancy and continuing afterwards with my post-pregnant body. Oh, and Mikarose offers tons of sizing options so their clothing will fit any body type and shape!

Be sure to check out the Mikarose website to find something for yourself!

May 15, 2013

Ikea Window Bench Storage Containers

These are our window benches made from Ikea Expedit shelves. See my tutorial here: Ikea No-Sew Window Bench Tutorial.

Almost as important as the fabric you choose for the cushion are the storage containers you choose to go inside the openings. These openings are about 13'x13'x15' so pretty large. It's hard to find that size of storage bin/container for cheaper than $15. And we had 10 spaces to fill! So we were definitely looking for something much more affordable.


These storage containers are actually made to fit this exact shelf from Ikea. I didn't initially see them in the store when I was there, but found them online and had them shipped to my house. They are Ikea's Drona Box. They fit perfectly. And the best part? They are only $4.99 each! It was impossible to find another storage container close to that price. They come in several colors, but we went with white. I've even seen other people get these containers then spray paint numbers/letters/etc. onto them. The possibilities are endless. 

For our 2nd window bench that is in our living room, I wanted storage containers that looked a little nicer. Don't get me wrong, the Ikea boxes look great and will hold up for a long time, but I saw another container that I instantly wanted. It's Target's Theshold Storage Bin. They also come in 3 colors, we went with the Natural color. Only down side is that they cost $12.99 each. I have a Target Red Card so I got an additional 5% off. You can wait until they go on sale if you'd like to chance getting the color/amount you want.


Did I mention that they hold A TON of stuff? It's an easy and convenient place to store toys, blankets, books, etc.


For more pictures of our nursery, check out my Nursery Reveal Here!


Ikea No-Sew Window Bench Tutorial

I've had many requests to do a Window Bench tutorial from my Nursery Reveal post. It was something I saw myself on pinterest and other blogs but had a hard time finding a good tutorial, and there's nothing more I'd like than for you to make one yourself! It has made such a big difference in our nursery and our living room. That's right, we made two!


Window Bench in our Girls' room


Window bench in our living room
Here are the finished products, don't you love the way they turned out? I love that you can customize it to whatever your taste in decor is.


I love this window bench for so many reasons:

1- It creates a high enough bench that my girls can look out the window. They love looking outside.
2- It provides a comfortable place to sit and read books, play, rest, etc.
3- The storage containers hold so many toys, blankets, etc. It helps keep clutter down and it's easy to clean things up now by just putting them away in the storage bins.
4- The bench in our living room adds 4-5 more seats for adults.
5- We made it ourselves! There is so much satisfaction in completing a project like this.


So on to the tutorial:
The first thing you will need is an Ikea Expedit Shelving Unit.
They come in different colors, but we preferred white. Follow the Ikea instructions for putting the shelving unit together. My husband did it within a few minutes, it was easy.

UPDATE: The Expedit Shelving Unit is no longer available from Ikea, however, the Kallax shelving unit is available and if it had been when I made my window benches, I would have used it because it is a little bit shorter with 4 openings instead of 5.


Next you'll need at least 2 sets of Ikea Capita Legs. We got the 4 inch ones which made the window bench plenty tall. It's the perfect height for kids to be able to climb up on the bench, and for adults to sit on it. We got 3 sets of Capita legs because we made two window benches.

They are easy to screw into the bottom of the Ikea Expedit shelf. We put the legs on each end and in the middle of the bench, totaling 6 legs.

Once the legs are attached to the shelving unit, you will need a piece of MDF board and foam. We got our MDF board cut at Home Depot (for free) to the dimensions of the shelving unit. The board cost us less than $15 and we had enough for both window benches with some board left over.
Here is some advice for the piece of foam. DO NOT buy your foam through a craft store like Hobby Lobby, Joann's, Michael's, etc. It costs way too much! I found a piece of foam at Smith's Marketplace for $20 which was big enough for 2 window benches. They had smaller sizes too so if you are just making one window bench, you can easily find a piece of foam for probably $10 or less at a hardware store or a similar store. 

You will need to cut the foam to fit the bench. Just place the piece of foam on top of the bench, use a Sharpie marker to mark the edges, then use a kitchen carving knife (electric) or whatever you have to cut the foam. 

We cut the foam to these dimensions:
72 inches long
15 inches wide
3 inches high

The only cut we had to make was to cut the foam piece in half length wise. It was already the proper dimensions pretty much. So we got 2 bench-seats worth of foam out of one piece.
Source


Source


Source

Now comes the cushion part of the bench. Several tutorials I saw skipped this step, but I would recommend adding quilt batting first, before the fabric. I bought a humongous bag of quilt batting at Walmart for about $5. First set the piece of quilt batting on the floor/table/bench, then the foam, then the MDF board. 

We actually stapled the fabric to the board/foam without the quilt batting the first time, then realized it didn't look very good. We could see bumps and areas where the foam wasn't quite straight, and it was hard to get the fabric tight enough. So we removed the staples and fabric and added the quilt batting.


Then simply stretch the quilt batting over the edges of the foam and MDF board and staple it with a staple gun! This was actually really fun. I found that by adding quilt batting, it provided a tighter surface area to stretch the final fabric over, which helped keep it nice and tight fitting.


After stapling the quilt batting, you will repeat the step but using fabric this time. You can choose any type of fabric you want. For the window bench in our nursery, we chose Pearl bracelet Andover fabric in Citron color . I had previously cut it and ironed it for a smooth surface once it was stapled on.

How much fabric do you need? I purchased 2 1/2 yards of fabric for each window bench. It was a little more than I needed, but I didn't want to cut it close, and I have a little bit left over if I need it in the future.

For our living room bench, we chose Waverly Sun N Shade Lovely Lattice in Lagoon color. I can't tell you how long it took me to decide on which fabric to use. I would suggest waiting until you absolutely fall in love with something. 

Tip #1: When choosing fabric, I would recommend a sturdy type, such as the Waverly Fabric I chose for our living room bench. It's an indoor/outdoor fabric made of durable Teflon-coated polyester fabric. It's breathable, will hold up to harsh sunlight, resist mold, mildew, soil, and stains. And they are easy to wipe off and clean. 

The fabric we chose for our nursery, the Pearl bracelet fabric, is a simple cotton fabric. I fell in love with the print that I decided to go with it even though the fabric itself isn't very sturdy. This may prove to be a mistake in the future, we'll have to see. I can already tell a huge difference in quality of the fabrics I chose, and would recommend going with a sturdy indoor/outdoor type of fabric.

Tip #2: When choosing fabric, I highly suggest viewing it in person to get the most accurate coloring/texture. There were many samples that I saw online but once I saw it in real life, the coloring was completely different. If you can't go see it for yourself in a craft store, then ask the seller to send you an actual picture in natural light. Both of the fabrics we chose were not available in my area, but the computer image compared to an actual picture of the fabric in natural light was such a huge difference, the difference between choosing it and not. 


Continuing on:
Pull the fabric tightly over the edge of the foam/board and staple it down. I actually folded the fabric so that the staple had 2 layers to grab onto to help prevent tearing in the future. 


 I found it was easier to stretch the fabric tighter when it was on a slippery surface like the top of the Expedit shelf, rather than on the carpet. You will want to pull and stretch the fabric generously to ensure the final product is tight with no puckering.


The corners got a little tricky, I had to experiment folding the fabric down different ways so it wouldn't pucker. When I finally found something that worked, I went to town staple gunning it down.


There you have it! The cushion is now complete with the MDF board, foam, quilt batting, and fabric. 


The final step is to attach the cushion part to the actual bench. 


Source
Simply grab some 3 inch screws, and screw them into the MDF board from underneath the bench. We screwed 2 into each end, plus another set in the middle to hold it on tight.

And waaalah! You have a beautiful window bench! Now that wasn't too hard was it? We will enjoy many years of fun with these window benches.


For more information on the storage containers/bins I chose for my window benches, look HERE.
Related Posts Plugin for WordPress, Blogger...